Organization Maintenance
The following sections describe the various activities that a application administrator role can perform.
Outline
- Organization Maintenance Screen
- Creating Organizations, Positions, and Roles
- Creating Working Groups
- Adding Organizations to Working Groups
- Adding Users to Working Groups
Organization Maintenance Screen
Use this screen to do the following:
- Create organizational structure, both complex and simple.
- Create departmental or organizational roles within your structure.
- Add users to roles or departments.
- Create working groups (i.e., shortcuts) to organize and access content that is shared across your organizational structure.
The icons indicate various information about type of folder you are viewing:
| Icon | Description |
| Organization Folder (indicated by the O on the folder icon) | |
| Working Group Folder (indicated by the WG on the folder icon) | |
| Shortcut to an Organization Folder (indicated by the arrow on the folder icon) | |
| Position Folder (indicated by the P on the folder icon) | |
| Role Folder (indicated by the R on the folder icon) | |
| User |
Creating Organizations, Positions, and Roles
The following task is an example scenario for using this screen.
-
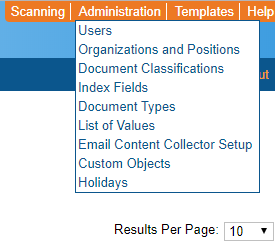
Click Administration > Organizations and Positions.
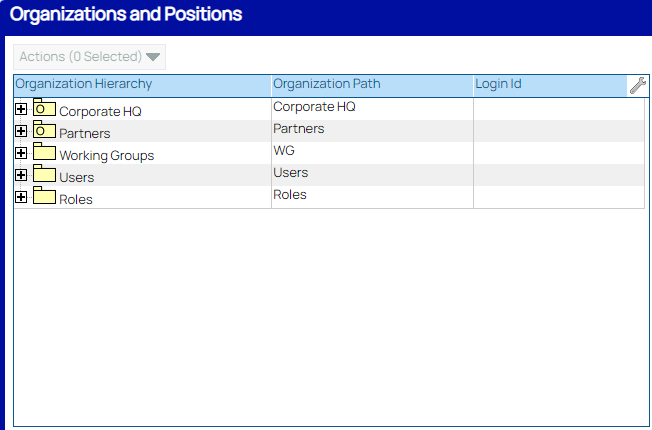
The Organization Maintenance screen appears. - Right-click the first Organization Folder icon (
).
The following options appear:- Add Child Organization
- Add Position
- Edit Organization
-
Expand the folder, and right-click an Organization Folder icon.
The same options appear, plus the Move Organization option. -
Right-click a Position Folder icon (
).
The following options appear: Add User, Edit Position, and Print. - Right-click a Working Group Folder icon (
).
The following options appear:- Add Child Working Group
- Edit Working Group
- Add User
- Select Organization(s) – Refer to the Adding Organizations to Working Groups topic for more information.
- Move Working Group
- Delete Working Group
-
Right-click a Shortcut Folder icon for an organization folder (
).
The following options appear: Remove organization and Print. -
Right-click a Role Folder icon (
).
The following options appear: Add User and Print. - Right-click a User icon (
 ).
).
The following options appear: Maintain User Account and Print.
Creating Working Groups
Working groups can be configured to help managers distribute saved searches to users across an organization.
Create a working group and a child working group:
-
In the top-right of the application, click Administration > Organizations and Positions.

The Organization Maintenance screen appears.

- Right-click the Working Groups folder, and click Add Working Group.
The Add Working Group window appears. - In the Name and Abbreviation fields, enter values, and click Save.
The new working groups folder appears with the name you entered and a WG Folder () icon by it.
- Locate the working group folder you created.
- To nest a new working group folder under the folder, right-click the folder, and click Add Child Working Group.
- In the Name and Abbreviation fields, enter values, and click Save.
The new working groups folder appears with the name you entered and a WG Folder () icon by it.
- To add organizations to this working group, refer to the Adding Organizations to Working Groups procedure.
Adding organizations to working groups can help Save Search Managers create organizational searches. Managers distribute these organizational searches to everyone within a working group. This step eliminates the need to create an organizational search for each organization folder and its users.
Adding Organizations to Working Groups
Working groups can be configured to help managers distribute saved searches to users across an organization.
Review this procedure to do the following:
-
To add organization folders to an existing working group.
-
To nest a new working group folder under an existing working group folder.
Adding organizations to working groups can help Save Search Managers create organizational searches. This step eliminates the need to create an organizational search for each organization folder and its users.
-
In the top-right of the application, click Administration > Organizations and Positions.

-
Expand the Working Groups folder and any relevant subfolders until the correct WG folder (
) is visible.
-
To add organization folders to the working group, right-click the folder, and click Select Organization(s). The Select Organization(s) window appears.
-
In the Type here to filter results field, enter an organization name, abbreviation, or path to filter the results.
-
Press Ctrl on your keyboard to select multiple organizations or positions.
If an organization is selected, then all of the positions directly under that organization will be included in the working group.
-
When you are finished, click Select.
Under a working group, the folder icons for organizations or positions have a small arrow in the corner to indicate it’s a shortcut to the original folder (
).
-
Back on the Organization Maintenance screen, to nest a new working group folder under the folder, right-click the folder, and click Add Child Working Group. The Add Child Working Group window appears.
-
In the Name field, enter a name for the working group folder. If you like you can also enter an abbreviation for the folder.
-
When you are finished, click Save.
-
To remove an organization from a working group, right-click the organization, and click Remove organization.
If you add a top-level position or organization, and you try to remove an embedded organization or position (that is set up in the organization structure originally, and not set up through the working group), then you cannot remove it; the only option available will be to print it.
Adding Users to Working Groups
After creating a new user in the system, you can add them to working groups by following the steps below.
-
In the top-right of the application, click Administration > Organizations and Positions.

-
Expand the Working Groups folder.
-
Expand any subgroups needed to find the working group you want to add the user to.
-
Right-click the desired working group, and click Add User.
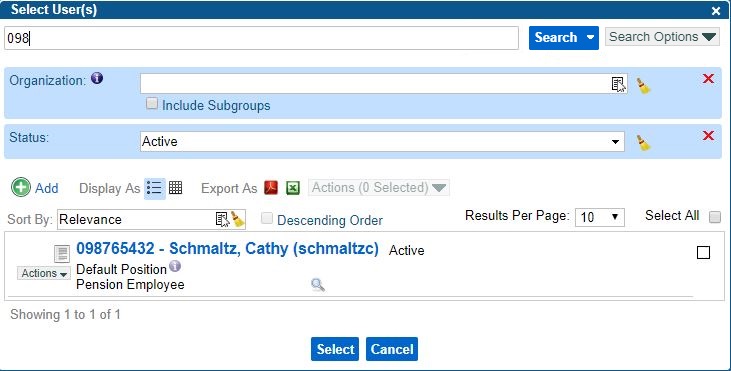
The Select User(s) window appears with the same search setup that can be seen throughout the website.
-
In the main Search field, enter a user social security number or last name, and click Search.

-
Select the intended user. The window closes, and the user appears under the Pension Corporate folder.