Add Documents to a Folder
An administrator can define a default classification for a folder definition. When adding a document to a folder, the default classification and classification index fields matching the folder fields will be pre-populated for the document being added. The user still needs to populate the document type and the other required index fields that cannot be obtained from folder fields.
To add documents, users can continue to use the Add button at the top-right of the toolbar on the Documents tab in a folder. The following task describes adding documents using the drag-and-drop feature.
-
From the Inbox screen, open a folder.
-
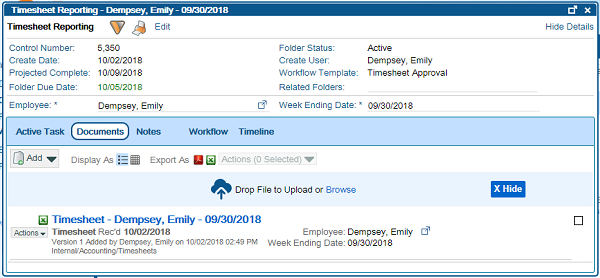
Click the Documents tab on the folder.
Existing documents and a Drop Files area appear.
-
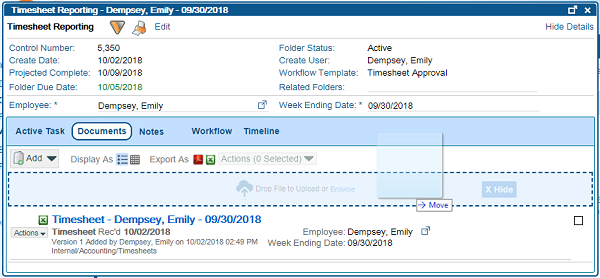
To add new documents, drag files over the window.
The window becomes a large drop area. You do not need to have your mouse over the designated Drop Files area.
-
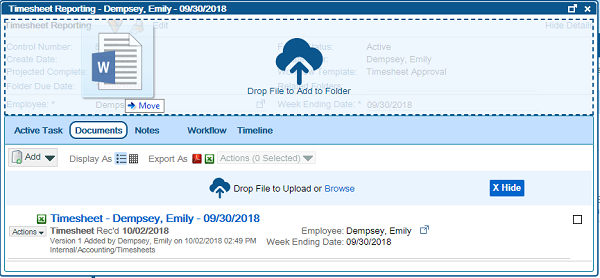
Release your mouse to add the document.
The document is added and the upload progress bar appears.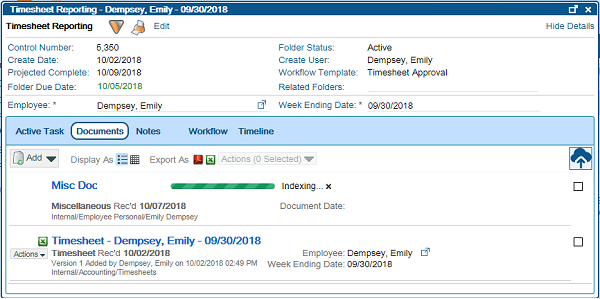
If index information is missing, the Document Indexing window appears. This will most likely be the case. -
In the Document Indexing window, enter the missing index fields, and click Save.
The file is added. -
Because the whole folder is a drop area, you can hide the defined Drop Files area by clicking Hide.
The Drop Area is hidden.

-
To see the Drop Files area again, click the Upload (
 ) icon to the right of the Toolbar.
 -
Drop a file directly over an existing document.

-
If document versioning is enabled, the Document Preferences window appears.

Select Add New Document and click OK.
The Document Indexing window appears. -
Enter information in the missing fields and click Save.
A new document is added. -
Drop a file directly over an existing document, and when the Document Preferences window appears, click Check in as New Version > OK.
A new version is checked in and the version number updates.