Checklists
Checklists are special Document searches that define an expected collection of document types in the system for a given set of search parameters. A checklist must be comprised of documents from a given Classification or its Sub-classes, with one or more other search filters to define what the checklist is for.
Follow the steps below to set up an example Checklist Saved Search. Learn about adding documents to a checklist here.
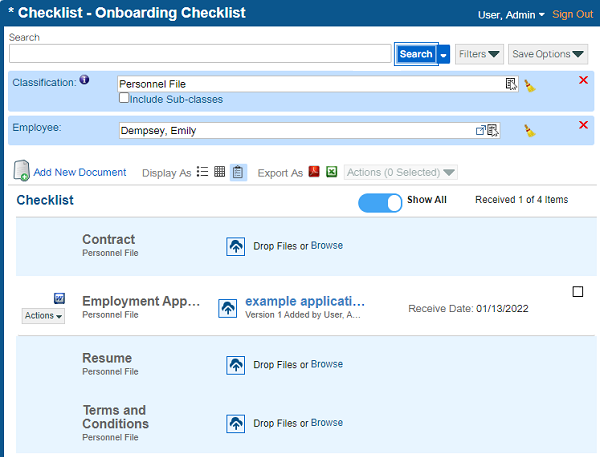
This tutorial will use an example checklist where several documents are required for a given Employee to complete an onboarding process.
1. On the Search Documents screen, select the Classification that documents in the checklist will belong to.
2. Select one or more other filters that will narrow down what a given checklist is for. For the onboarding example, you would add an Employee field.
3. Open the Save Options Menu and click Create New Checklist.
The Create Checklist window appears.
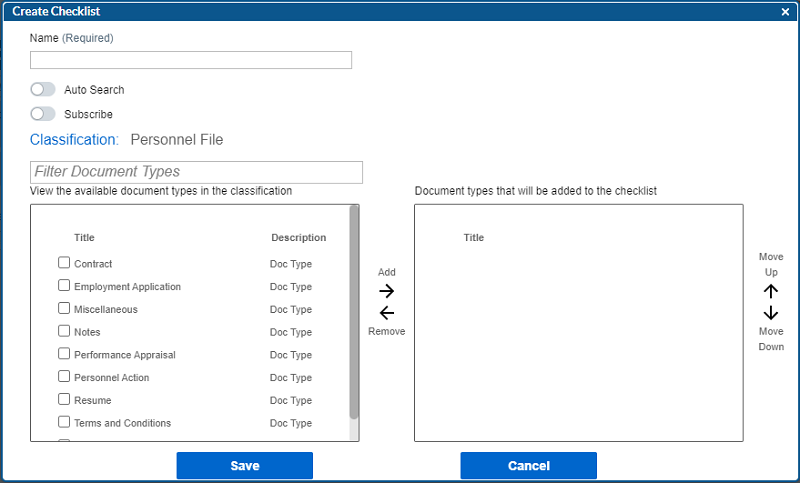
The left pane displays all the document types available within the classification that is selected for the saved search (plus any Sub-classes, if Include Sub-Classes was checked). The right pane displays all the documents types that will be included in the checklist.
4. Add document types to the right side of the screen to include them in the checklist.
Remove document types back to the left side of the screen and they will not be part of the checklist.
Move document types up or down to change the order that they will appear in the checklist.
5. Click Save.
The checklist is saved and can be found in the left-hand menu.
Below is what an onboarding checklist would look like for an employee with only one document from the checklist added to the system so far.
Toggle Show All off to only see missing items; toggle it on to see items that are already in the system too.