Understanding Search Results
Search Results - List View
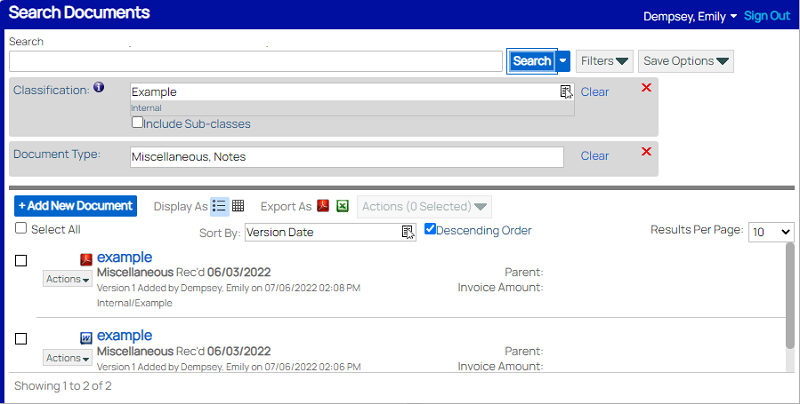
Each search screen has its own default Sort By field. To change how the search results are sorted, click on the Select icon (![]() ) in the Sort By input and navigate to the desired index field. Reverse the sort ordering by clicking the Descending Order checkbox. It is recommended that you Sort By Relevance when using advanced syntax for a Free-Text filter in your search.
) in the Sort By input and navigate to the desired index field. Reverse the sort ordering by clicking the Descending Order checkbox. It is recommended that you Sort By Relevance when using advanced syntax for a Free-Text filter in your search.
You can export the results of a search to either PDF or Excel by clicking on the desired Export As icon. Learn more about exporting in Exporting Search Results.
View a search result item by clicking on its blue title. In the screen shot above, example note is the title of a document which the user can view when they click example note.
Select a result by clicking on its checkbox at the right of the screen. Some search screens will only allow you to select one item at a time. Search screens that allow you to select multiple items at a time will have a Select All checkbox at the top, which will select all items you see on the screen.
The Actions menu at the top of the screen lists actions you can perform on all selected items. The Actions menu to the left of each item lists the actions you can take on that specific item. Most search screens just allow you to view, print, view/add Notes, or Re-Index. There are many more actions that users can take on Documents specifically; learn more in Document Actions Overview.
Some search results may have a Pop-Out Icon ( ) next to one or more data fields. Fields with that icon represent Custom Objects, which can be viewed by clicking the Pop-Out Icon.
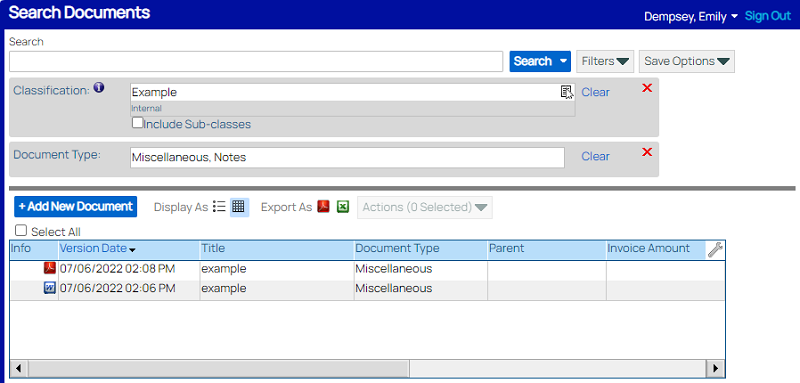
By default, the search results display in List view, as indicated by the highlighted List icon ( ) next to Display As. If desired, switch to Grid view by clicking on the Grid icon (
 ). List view is typically easier on the eyes, but Grid view allows you to see more results and more data about each result. Learn more about Grid view in Customizing Search Columns.
Search Results - Grid View