Scanning & Indexing
Outline
- Overview
- Using the QAction Scan Application
- Creating Document Batch Cover Sheets
- Creating Document Separator Cover Sheets
- Index Documents Screen
- Viewing Rescan Queue
Overview
With scan and indexing operator privileges, users can view the Index Documents screen and scan documents into the system, respectively.
Review the following related tasks.
- Create batch cover sheets or document separator sheets using the correct procedures.
- For document batches, insert Batch Cover Sheets between documents, and then use your scanning software to scan the documents.
- Once all documents are scanned, visit the Index Documents screen to index the batches.
- If the Document Separator Sheet (which includes a barcode for index field metadata) is inserted in front of a document, and it is scanned into the system, then there are no more actions to take. The document is indexed and added to the system.
- To view the document that is scanned into the system, you must have scan and indexing operator privileges for the same Source Organization that was selected when the separator sheet was created or when a batch document was created from the Index Documents screen.
Using the QAction Scan Application
Not all users have access to this software. This software works with QAction to complete the scanning process.
- On your desktop, locate and double-click the QAction Scan icon.

- The QAction Scan Login window appears.
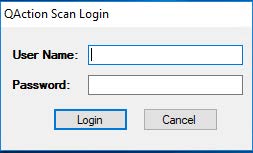
- The QAction Scan Login window appears.
-
Enter your User Name and Password, and click Login.
The QAction Scan Documents screen appears.
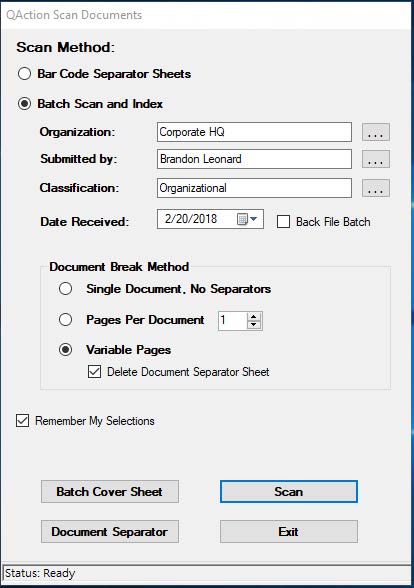
- Review the various options on the screen:
- Bar Code Separation Sheets – If the documents are using a barcode cover sheet for auto-indexing, select this option for scanning.
- Batch Scan and Index – If the documents are using a batch cover sheet for document separation, select this option for scanning.
- Organization – Enter your default location.
- Submitted by – Ensure it defaults to your name as the person scanning.
- Classification – Enter the department (classification) the documents are being scan to. For example, Risk Finance or Claims.
- Date Received – If known, enter the date the documents were received. This field defaults to the current date.
- Back File Batch – If selected, the batch scans as a “Back File” batch and QAction workflow tasks are not created. If it is not selected and the selected classification is connected to a workflow, any workflow initiating documents creates a workflow task. - Document Break Method – This section determines how document separation occurs for the batch being scanned. The following are the available options:
- Single Document, No Separators – If scanning a single document for a classification, select this option.
- Pages Per Document – If scanning documents with a fixed number of pages, select this option.
- Variable Pages – If using batch cover sheets to scan, select this option. - Remember My Settings – If selected, the scan application remembers the currently selected scan settings. The next time you log in to the scan application, the remembered settings automatically populate. - Batch Cover Sheet button – This option is normally used if scanning a single document at a time. Index information for the selected classification is created and a barcode cover sheet is printed to automatically index the document when it is scanned. - Document Separator button – Click to print a Patch 2 cover sheet. - Scan button – Click to scan documents with the selected classification. - Exit button – Click to exit the scan application.
-
Select the correct options, and click Scan.
The QAction Quality Assurance screen appears.
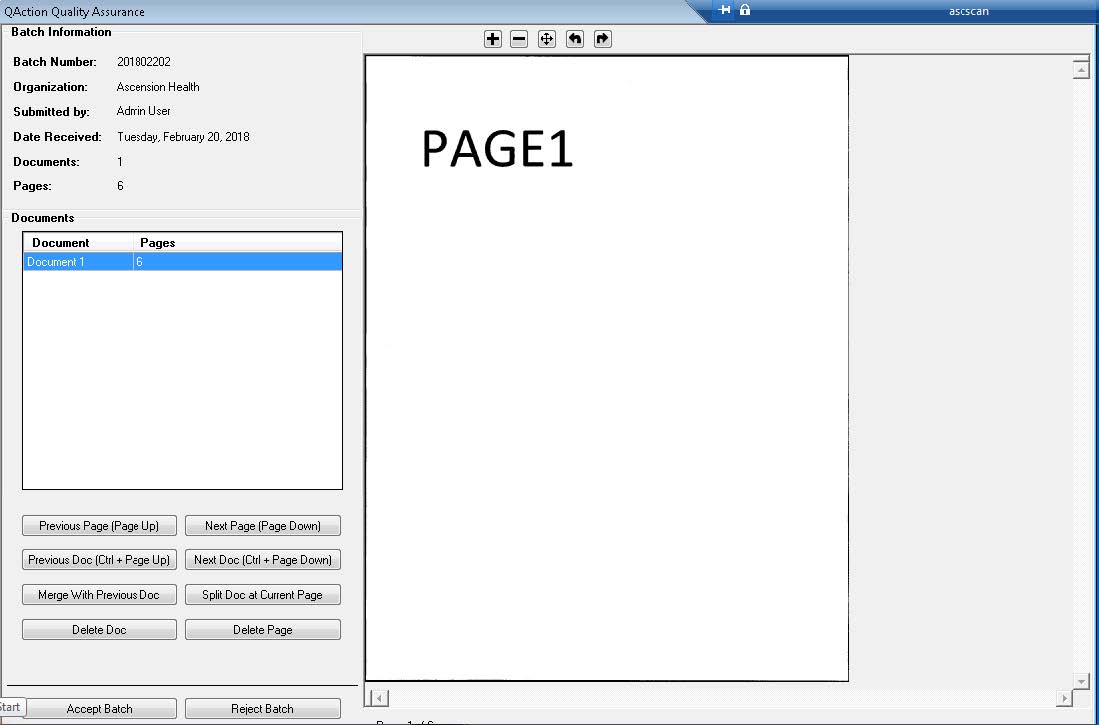
- Review the various information about the document batch on the screen:
- Batch Number – The number that was created to identify the batch you scanned.
- Organization – The organization that was chosen on the QAction Scan Documents screen.
- Submitted by – The person that was chosen at the QAction Scan Documents screen.
- Date Received – The date that was chosen at the QAction Scan Documents screen. This value defaults to the current date.
- Documents – The number of documents that were scanned.
- Pages – The total number of pages for the batch.
- Review the various options you can select:
- Previous Page (Page UP)/Next Page (Page Down) – Click to move between pages in the viewer for the current document. Keyboard shortcuts are available.
- Previous Doc (Ctrl + Page Up)/Next Doc (Ctrl + Page Down) – Click to move between the documents in the viewer. Keyboard shortcuts are available.
- Merge With Previous Doc – Click this button to merge multiple documents together.
- Split Doc at Current Page – Click this button to split one document into two documents.
- Delete Doc – Click to delete a document from the batch.
- Delete Page – Click to delete a page from a document.
- Accept Batch – Click to approve the batch and moves it onto batch processing. After this is selected, the QAction Scan Documents screen closes.
- Reject Batch – Click to reject an entire batch. A confirmation screen appears confirming that you want to reject the batch and delete it.
-
In the viewer pane, click the Zoom In (
 ) or Zoom Out (
 ) buttons to zoom in or out on the current page.
 -
In the viewer pane, click the Adjust (
 ) button to return the viewer to the default viewer.
 -
In the viewer pane, click the Rotate (
 ) buttons to rotate the page currently in the viewer.
 - After splitting, merging, or deleting pages in the batch, click Accept Batch.
- The scanning operation is completed in the QAction Scan application, return to the QAction web browser to complete the indexing.
Creating Document Batch Cover Sheets
Perming this task requires Scan Operator privileges.
-
Click the Scanning menu at the top-right.

- Click Create Batch Cover Sheet.
The Create Batch Cover Sheet screen appears.

-
Select either Bar-Coded Batch Cover Sheet (and enter information in the fields) or Blank Batch Cover Sheet.
-
Select or clear the Document Separator checkbox as needed.
- Click Generate.
- The batchcoversheet.pdf generates and downloads.
-
Navigate to your Downloads folder, open the cover sheet, and print it as needed.
-
For document batches, insert Batch Cover Sheets between documents, and then use your scanning software to scan the documents.
- Once all documents are scanned, visit the Index Queue screen to index and split the batches in the Batch Assembly window.
Creating Document Separator Cover Sheets
If the document separator sheet (which includes a barcode for index field metadata) is inserted in front of a document, and it is scanned into the system, then there are no more actions to take. The document is indexed and added to the system.
- Within the application, click the Scanning menu at the top-right.
- Click Create Document Cover Sheet.
The Create Document Cover Sheet screen appears.

- Enter information in the necessary fields, and then click Generate.
The separatorsheet.pdf generates and downloads. - Navigate to your Downloads folder, open the cover sheet, and use it as needed.
To view the document that is scanned into the system, you must have scan operator privileges for the same Source Organization that was selected when the separator sheet was created or when a batch document was created from the Index Queue.
Index Documents Screen
A user with indexing operator privileges can access the Index Documents link in the left-hand menu.
The Index Documents screen shows batches that have been scanned or otherwise imported into QAction such as through a fax integration. These batches need to be split into distinct documents as appropriate, and indexed with the proper metadata to be fully added to the system.
-
In the left navigation pane, click Index Documents.
The Index Documents screen appears.

-
Select an organization to Show Queues For.
-
Click Search to view documents in the Index Documents queue for the selected organization.
-
Choose a document from the queue, and click the Actions menu.
-
Click Index Batch. This opens the Batch Assembly screen, where the batch can be split into its component documents and indexed into the system accordingly.
Viewing Rescan Queue
- Within the application, click the Scanning menu at the top-right.
- Click View Re-scan Queue.
The View Rescan Queue screen appears. - Select a batch in the grid and click View.
- To delete a queue item, click a batch in the grid, and click Delete