Managing Persons and Users
The following sections describe the various activities that a application administrator role can perform.
Outline
- Creating a New Person Entry
- Attaching a New Person to an Application User Account
- Configuring User Privileges, Preferences, and Proxies
- Configuring Staff Managers
Creating a New Person Entry
If you need to add a new user to the system, the first task is to create a Person object to represent them in the system following the steps below.
- In the left navigation pane, click the Person tab.
The Search Person screen appears. - In the main Search field, enter a person’s last name or social security number, and click Search.
If no results appear, then a new person needs to be created. -
In the Search Person window, click Add New Person.
The Add/Modify Person window appears.

- Enter the person’s information, and click Save.
The person is created in the system. - To make the person an actual user in the system, refer to the Attaching a New Person to an Application User Account procedure.
Attaching a New Person to an Application User Account
If you have already created a Person in the system, but you need to create an application user account for them, perform this task.
-
In the left navigation pane, click the Person tab.
The Search Person screen appears. - In the main Search field, enter a person’s last name or social security number, and click Search.
The results for the person appear. - Click the Actions menu, and click Add User.
The Add/Modify Person window appears with the person information fields populated (ex. Name, Email, Entity). -
Under the Application User section, enter information to add the person as a user in the system

- Click Save.
Configuring User Privileges, Preferences, and Proxies
In the top-right of the application, click Administration > Users.

The Search Users screen appears.
In the Search field, enter the employee name, and click Search.
The user result appears.
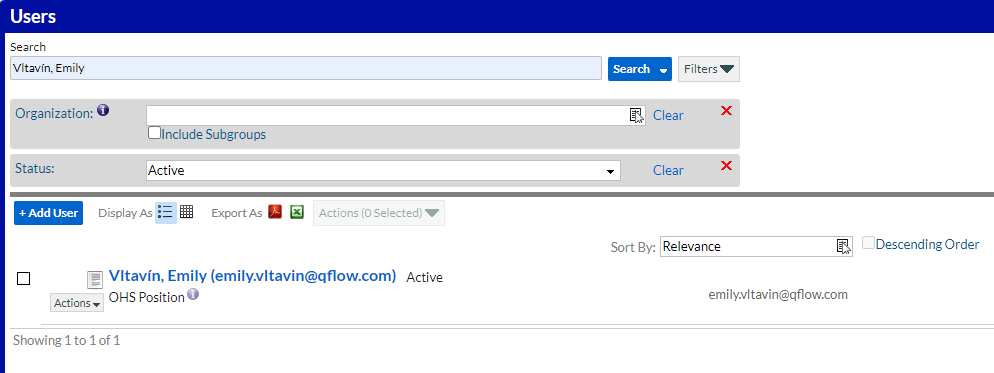
Click the user’s name in the results.
The Person window appears.
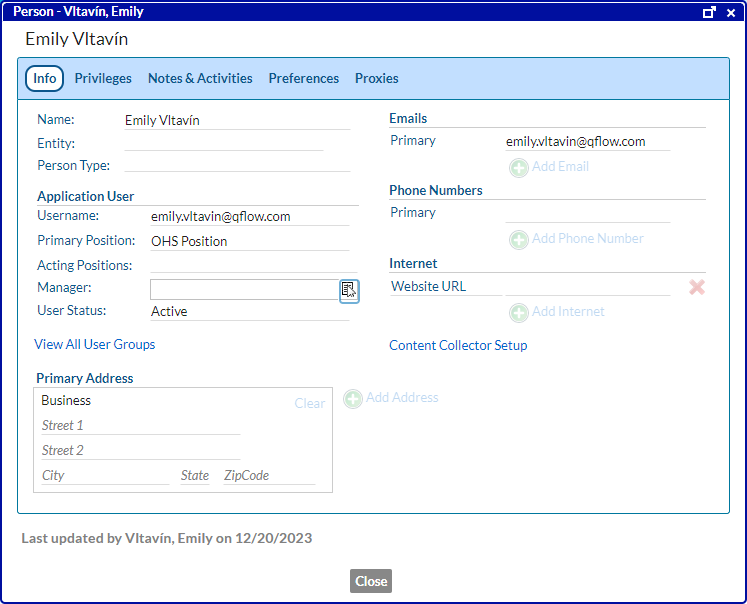
To configure a Staff Manager, in the Manager field, enter or select the Position folder for the manager.
To configure other user privileges, click on the Privileges tab.
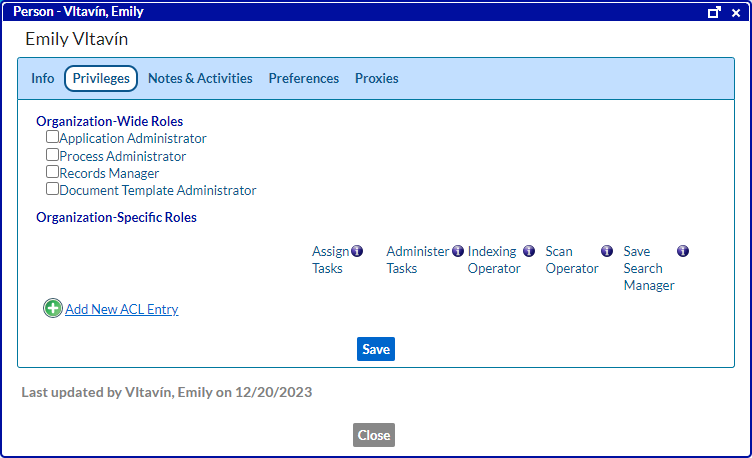
The Organization-Wide Roles are just straightforward checkboxes to determine if the user has access to certain application-level privileges.
The Organization-Specific Roles section allows you to select specific organizations in which the user has certain privileges.
- Assign Tasks allows the user to reassign tasks to a different user or organization.
- Administer Tasks allows the user to work tasks not assigned to them. Learn more in Assigning and Administering Tasks
- Indexing Operator allows the user to index documents from the index queue.
- Scan Operator allows the user to scan documents into the index queue.
- Saved Search Manager allows the user to create organizational saved searches.
To give the user one or more of these privileges within a particular organization, click Add New ACL Entry. Then select the organization, position, or working group, and then click Select.
The organization and {All Subgroups} appear under the Organization-Specific Roles section. From there simply click on the relevant checkboxes, and click Save.
Administrators can also modify preferences and proxies for users by clicking on the relevant tab. These tabs function just like when a user modifies their own preferences and proxies.
Configuring Staff Managers
If you manage several user employees and need to monitor their tasks, you can add your role as Manager for each employee. Then a Staff Inbox tab appears in your Inbox screen where you can view all the pending tasks for your employees. You must be a manager of the user within the same company hierarchy.
To learn more about staff manager tasks, refer to Viewing Pending Tasks for Staff Members under Special User Privileges.
If the manager is already set up in their position, skip directly to step 5.
- In the top-right of the application, click Administration > Organizations and Positions.
- Locate the correct Position folder that your manager is under (ex. HR Representative).
- Right-click the Position folder, and click Add User.
The Select User(s) window appears. - Search for the name of your manager, and select the name.
The user name is added under the HR Representative Position folder. - In the top-right of the application, click Administration > Users.
The Search Users screen appears. - Enter the name of the employee (ex. Jane Smith), and click Search.
- Click the employee name.
The Person window appears. - In the Manager field, enter or select the Position folder for the manager (ex. HR Representative).
- Sign out of the Application Administrator account, and log in to the application as the manager you added to the employee’s account.
- Once you are logged in with the manager account, click Inbox.
- On the Inbox screen, click the Staff Inbox tab.
- In this tab, view any pending tasks of employees that have you listed as their manager.